Introduction
Zmodo cameras are renowned for their reliability, ease of use, and affordability in the home security market. And these versatile devices offer a range of features including high-definition video streaming, night vision, motion detection. And remote access through mobile apps. Thus, this guide will walk you through a step-by-step process to Zmodo camera setup with seven detailed subheadings. And to ensuring that you can harness its full potential.
Unboxing and Inspection to Zmodo camera setup
Step 1: Begin by unboxing your Zmodo camera and verify that all components are included. Typically, this includes the camera unit itself, a power adapter, a mounting kit, an instruction manual, and potentially a microSD card if it’s required or included.
Step 2: Carefully inspect the camera for any visible damage. And ensure the lens is clean and undamaged. And check that the power cord and adapters are in good condition.
Step 3: Familiarize yourself with the different parts of the camera – such as the lens, microphone, LED indicators, and reset button – as detailed in the instruction manual.
Hardware Installation to Zmodo camera setup
Step 1: Choose a strategic location for your camera. This should be a spot that provides a wide field of view while being close enough to a power outlet and ideally, has a stable Wi-Fi signal.
Step 2: Use the provided mounting kit to install the camera on a wall or ceiling. Follow the manufacturer’s guidelines for proper alignment and stability.
Step 3: Plug in the camera using the power adapter. Wait for the LED indicator lights to turn on, signaling that the camera is powered up.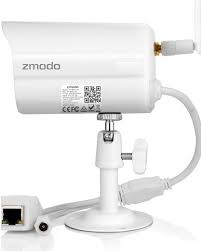
Connecting to Wi-Fi to Zmodo camera setup
Step 1: Download and install the Zmodo app from either Google Play Store or Apple App Store onto your smartphone or tablet.
Step 2: Launch the app and create an account, or log in if you already have one.
Step 3: In the app, select “Add Device” and follow the prompts to connect your Zmodo camera to your Wi-Fi network. You’ll need to enter your Wi-Fi password when prompted.
Step 4: The app will search for available Zmodo cameras on your network. Once it detects yours, follow the on-screen instructions to pair the camera with your Wi-Fi.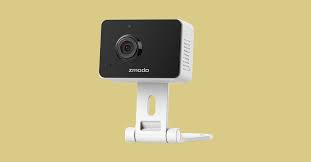
Camera Configuration to Zmodo camera setup
Step 1: After successfully connecting to Wi-Fi, you can now customize your camera settings. Adjust resolution, frame rate, and other visual settings according to your preference and internet bandwidth.
Step 2: Set up motion detection parameters. Most Zmodo cameras allow you to define areas of interest where motion should trigger alerts and recordings.
Step 3: Configure push notifications to receive alerts when motion is detected, or if the camera loses connection.
Step 4: If your model supports it, consider setting up night vision mode and adjusting sensitivity settings for optimal performance.
Remote Viewing and Management
Step 1:Meanwhile, with the camera connected and configured, you can now remotely view live footage and recorded videos from anywhere via the Zmodo app.
Step 2:Besides, explore the playback options to review past recordings, if your camera has local storage or cloud recording capabilities.
Step 3:Moreover, manage multiple cameras within the same app interface, switching between views or grouping them into custom layouts.
Firmware Updates and Maintenance
Step 1:Hence, keep your Zmodo camera up-to-date with the latest firmware. The app will usually notify you when updates are available; simply follow the prompts to install them.
Step 2:Consequently, regularly clean the camera lens to ensure clear visuals. Check for obstructions, such as spider webs or debris, which could interfere with the camera’s operation.
Step 3:In contrast, if you experience connectivity issues or other problems, try resetting the camera to its factory settings before troubleshooting further.
Troubleshooting and Support to Zmodo camera setup
Step 1:Therefore, should you encounter difficulties during setup or operation, consult the Zmodo user manual first for common solutions.
Step 2:Moreover, utilize the Zmodo support resources, which may include online FAQs, forums, or customer service hotlines.
Step 3:Otherwise, if necessary, reach out to Zmodo’s customer support team to report issues, request assistance, or inquire about warranty coverage.
Conclusion
In conclusion, Zmodo camera setup involves a systematic process from unboxing to configuration and maintenance. By following these steps, you’ll be able to enjoy peace of mind knowing your home or business is protected by a reliable, smart surveillance system.